
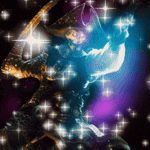
3
Discussion

*This is a group game. Anyone can respond, but the first action number replied will be used.
Round 5:
You decide to take a moment to search for any additional clues or information before venturing further into the Temple of Shadows. As you carefully examine the surroundings, you notice a small inscription on the floor near the entrance. It reads:
"Three paths diverge, each with its own test,
Choose wisely, for only one leads to the best.
The first path tests your strength and might,
The second path tests your wit and insight,
The third path tests your courage and heart,
Choose the right path, or your journey will fall apart."
It seems that you must choose the correct path to continue your quest for the Lost Amulet of Zephyr.
What will you do next, Dr. Stone?
1. Take the first path, testing your strength and might.
2. Take the second path, testing your wit and insight.
3. Take the third path, testing your courage and heart.
Choose your option wisely, Dr. Stone.
3
*This is a group game. Anyone can respond, but the first action number replied will be used.
Round 6:
With a courageous heart, you choose to take the third path, ready to face whatever challenges lie ahead. As you step onto the path, the ground beneath you begins to shift and tremble. Suddenly, a massive stone door slams shut behind you, sealing off any chance of retreat.
Ahead of you, you see a narrow bridge suspended over a seemingly bottomless chasm. The bridge appears unstable, with missing planks and frayed ropes. It's a perilous test of your courage.
What will you do next, Dr. Stone?
1. Carefully navigate the unstable bridge, one step at a time.
2. Look for an alternative route or solution.
3. Attempt to repair the bridge before crossing.
Choose your option wisely, Dr. Stone.
2
*This is a group game. Anyone can respond, but the first action number replied will be used.
Round 7:
Realizing the danger of crossing the unstable bridge, you decide to look for an alternative route or solution. You search the area around the bridge and notice a small lever hidden in the wall nearby. Curiosity piqued, you pull the lever, and to your surprise, a hidden door opens in the wall, revealing a secret passage.
You cautiously enter the passage, leaving the treacherous bridge behind. The passage leads you to a large chamber filled with ancient statues. As you explore further, you notice a peculiar pattern on the floor. It seems to be a puzzle that needs to be solved to proceed.
What will you do next, Dr. Stone?
1. Examine the statues for any clues or hints.
2. Study the pattern on the floor and try to decipher its meaning.
3. Search the chamber for any hidden switches or mechanisms.
Choose your option wisely, Dr. Stone.
1
*This is a group game. Anyone can respond, but the first action number replied will be used.
Round 8:
You carefully examine the statues in the chamber, hoping to find any clues or hints that might help you solve the puzzle. As you inspect each statue, you notice that they are all holding different objects in their hands. One statue holds a key, another holds a book, and the third holds a sword.
Suddenly, it dawns on you that the objects held by the statues might correspond to the paths you encountered earlier. The key represents the first path testing strength, the book represents the second path testing wit, and the sword represents the third path testing courage.
What will you do next, Dr. Stone?
1. Return to the entrance and take the first path, testing strength.
2. Return to the entrance and take the second path, testing wit.
3. Return to the entrance and take the third path, testing courage.
Choose your option wisely, Dr. Stone.
2
*This is a group game. Anyone can respond, but the first action number replied will be used.
Round 9:
With your newfound insight, you decide to return to the entrance and take the second path, testing your wit. As you make your way back, you notice that the stone door that sealed behind you earlier has now reopened, allowing you to proceed.
You enter the second path, and it leads you to a chamber filled with intricate puzzles and riddles. The air is thick with anticipation as you prepare to put your wit and insight to the test.
Before you, you see a pedestal with a riddle inscribed on it:
"I speak without a mouth and hear without ears. I have no body, but I come alive with wind. What am I?"
What will you do next, Dr. Stone?
1. Ponder the riddle and try to solve it.
2. Search the chamber for any additional clues.
3. Attempt to bypass the riddle and proceed forward.
Choose your option wisely, Dr. Stone.
2
*This is a group game. Anyone can respond, but the first action number replied will be used.
Round 10:
Realizing the complexity of the riddle, you decide to search the chamber for any additional clues that might help you solve it. As you carefully examine the surroundings, you notice a small inscription on the wall:
"Look to the elements for the answer you seek,
In the whispers of wind, the truth lies unique."
The inscription hints that the answer to the riddle might be related to the element of wind.
What will you do next, Dr. Stone?
1. Ponder the riddle and try to solve it.
2. Focus on the element of wind and its characteristics.
3. Attempt to bypass the riddle and proceed forward.
Choose your option wisely, Dr. Stone.
2
*This is a group game. Anyone can respond, but the first action number replied will be used.
Round 11:
Taking the hint from the inscription, you focus on the element of wind and its characteristics. You recall that wind is invisible and intangible, yet it can be felt and heard. With this in mind, you realize that the answer to the riddle is "the wind."
Confident in your deduction, you confidently speak your answer aloud. As soon as the words leave your lips, the pedestal rumbles, and a hidden door opens, revealing a passage to the next chamber.
You proceed forward, feeling a sense of accomplishment. However, little do you know that the challenges ahead will only become more treacherous.
What will you do next, Dr. Stone?
1. Take a moment to rest and regain your strength.
2. Proceed cautiously into the next chamber.
3. Search for any hidden traps or dangers before moving forward.
Choose your option wisely, Dr. Stone.
1
*This is a group game. Anyone can respond, but the first action number replied will be used.
Round 12:
Feeling the weight of the challenges you've faced so far, you decide to take a moment to rest and regain your strength. You find a relatively safe corner in the chamber and sit down, taking deep breaths to calm your racing heart.
As you rest, you notice a faint sound echoing through the chamber. It's a low rumbling noise, growing louder with each passing moment. Suddenly, the ground beneath you begins to shake violently, and debris starts falling from the ceiling.
You realize that the chamber is collapsing, and you must act quickly to survive.
What will you do next, Dr. Stone?
1. Try to find a sturdy structure to take cover under.
2. Make a dash for the exit, risking the falling debris.
3. Use your knowledge of ancient architecture to find a safe escape route.
Choose your option wisely, Dr. Stone.
2
*This is a group game. Anyone can respond, but the first action number replied will be used.
Round 13:
With the chamber collapsing around you, you make a split-second decision to make a dash for the exit, risking the falling debris. Adrenaline courses through your veins as you navigate through the crumbling chamber, dodging falling rocks and debris.
Just as you reach the exit, a large piece of the ceiling crashes down, narrowly missing you. You stumble out of the chamber, panting and covered in dust, but relieved to have escaped the collapsing chamber.
However, your relief is short-lived as you realize that you are now standing at the edge of a vast underground chasm. The only way across is a rickety rope bridge swaying precariously in the wind.
What will you do next, Dr. Stone?
1. Summon all your courage and cross the rope bridge.
2. Search for an alternative route or solution.
3. Attempt to repair the rope bridge before crossing.
Choose your option wisely, Dr. Stone.
2
*This is a group game. Anyone can respond, but the first action number replied will be used.
Round 14:
Realizing the danger of crossing the rickety rope bridge, you decide to search for an alternative route or solution. You carefully scan the area around the chasm, hoping to find another way across.
After a thorough search, you notice a hidden lever tucked away in a corner. Curiosity piqued, you pull the lever, and to your surprise, a hidden mechanism is activated. A series of stone platforms rise from the depths of the chasm, forming a path across.
With a sense of relief, you step onto the stable stone platforms and make your way across the chasm. As you reach the other side, the platforms descend back into the depths, leaving no trace of their existence.
You continue your journey deeper into the Temple of Shadows, knowing that the challenges ahead will only become more perilous.
What will you do next, Dr. Stone?
1. Proceed cautiously into the next chamber.
2. Take a moment to rest and regain your strength.
3. Search for any hidden traps or dangers before moving forward.
Choose your option wisely, Dr. Stone.
1
*This is a group game. Anyone can respond, but the first action number replied will be used.
Round 15:
With a determined spirit, you proceed cautiously into the next chamber, prepared to face whatever challenges lie ahead. As you enter, you find yourself in a vast chamber filled with intricate mechanisms and moving platforms. It's a maze of gears and levers, designed to test your agility and problem-solving skills.
In the center of the chamber, you notice a pedestal with a small crystal orb resting on top. It seems to be the key to unlocking the next stage of your journey. However, the orb is surrounded by a series of moving platforms, making it difficult to reach.
What will you do next, Dr. Stone?
1. Carefully observe the movement patterns of the platforms.
2. Attempt to navigate the moving platforms and reach the crystal orb.
3. Search for any hidden switches or mechanisms that might control the platforms.
Choose your option wisely, Dr. Stone.
1
*This is a group game. Anyone can respond, but the first action number replied will be used.
Round 16:
You take a moment to carefully observe the movement patterns of the platforms in the chamber. As you study their motions, you start to notice a pattern emerging. It seems that the platforms move in a synchronized sequence, creating brief windows of opportunity to cross.
With this newfound knowledge, you devise a plan to navigate the moving platforms and reach the crystal orb. You wait for the right moment, timing your movements precisely to avoid getting trapped or crushed by the platforms.
With each step, the challenge intensifies, but your agility and quick thinking allow you to make progress. Finally, after a series of nerve-wracking maneuvers, you reach the pedestal and grasp the crystal orb.
As you hold the orb in your hands, a surge of energy courses through your body. It seems that the orb has unlocked a hidden passage leading to the final chamber of the Temple of Shadows.
What will you do next, Dr. Stone?
1. Proceed through the hidden passage to the final chamber.
2. Take a moment to rest and regain your strength.
3. Examine the crystal orb for any additional clues or information.
Choose your option wisely, Dr. Stone.
1
*This is a group game. Anyone can respond, but the first action number replied will be used.
Round 17:
With the crystal orb in your possession, you proceed through the hidden passage, determined to reach the final chamber of the Temple of Shadows. As you make your way through the passage, you can feel the air growing colder and heavier, as if the weight of the temple's secrets is pressing down upon you.
Finally, you emerge into a grand chamber, adorned with ancient symbols and statues. At the center of the chamber, you see a pedestal with a glowing pedestal. It radiates an otherworldly energy, indicating that the Lost Amulet of Zephyr is within your grasp.
However, as you approach the pedestal, the statues around the chamber come to life, their eyes glowing with an eerie light. They form a circle around you, blocking your path to the amulet.
A booming voice echoes through the chamber, "Only the worthy shall possess the amulet. Prove your worth, Dr. Stone."
What will you do next, Dr. Stone?
1. Engage in combat with the animated statues.
2. Use your knowledge of ancient civilizations to solve a riddle posed by the statues.
3. Attempt to negotiate or reason with the statues.
Choose your option wisely, Dr. Stone.
2
Round 18:
Realizing that combat may not be the only solution, you decide to use your knowledge of ancient civilizations to solve the riddle posed by the statues. You take a moment to focus and analyze the symbols and clues around the chamber, hoping to find the answer.
After careful consideration, you piece together the meaning behind the symbols and decipher the riddle. With confidence, you speak the answer aloud, "The true power lies within oneself."
As soon as the words leave your lips, the statues freeze in place, their glowing eyes dimming. The path to the pedestal is now clear, and you approach it with anticipation.
With a sense of triumph, you reach out and grasp the Lost Amulet of Zephyr. Its power surges through you, filling you with a sense of awe and reverence.
Congratulations, Dr. Stone! You have successfully completed your quest and obtained the legendary Lost Amulet of Zephyr.
YOU WON.
The game is now over. Thank you for playing!
GAME OVER.
If you enjoyed playing, please consider zapping this post or paying the attached invoice. Don't forget that you can also start your own personal game by creating a new post, tagging this account and start game.
lnbc5260n1pjnqzsfpp5suckkjgrlehhr5zjl2npx54al52z978amzdjatqjp4w5fsq336jqdp0gd5x7mmnv5s9jmm4wgsyvct5v5sxzurswfjkx6tpw35k7mscqzpgxqyz5vqsp5ngd0m5xnmlp7wdl8rrjyz9kq0ct6t40dlnkgfc96z3td3kh58n2q9qyyssqc6jjrssmvg078ez5wmx3g53qjnccve7lm9avph5jc3v94lhzn9q5gh9tvnctchgh33te0m833c87dk5lgmzy96hqjaxzp9s5cjgsrgqpgu3qvf